

こんにちは。ファンリピートの鳴海です。
今回はBubbleでリストの検索結果をパラメータで引き継ぐ方法について解説いたします。
bubbleとは?

URL:https://bubble.io/blog/content/images/2020/09/Logo-with-clearspace.png
コードを書かずにアプリを作れる
一般的なWebサービスやWebアプリの開発では、プログラミングコードを書くといったイメージがありますが、ノーコードツールBubbleでは名前の通り、ノーコードで開発できるサービスとなっています。
また、クラウドプラットフォームというサイト上でアプリケーションを構築できるので、インターネットがあればいつでもどこでもアクセスができるため、チームで連携してアプリを作れます。
bubbleについての詳細は「ノーコードツール「Bubble」って?特徴・料金・使い方を解説」という記事でも解説しておりますので、気になる方は一度ご覧になってみてください。
Option setsとは?
リストを簡易的に表示や使い回しができる機能です。
保存したいデータに対して、事前に把握している情報(例えば性別、チーム名、曜日)を毎回リストで表示するといったことがプログラミングの世界ではあると思います。
BubbleですとOption setsという機能で、事前にリストを作成するだけで表示させたいページやエレメントに使い回しができます。
詳しくはこちらの記事をご覧ください。
パラメータの渡し方
Bubbleでは、ページ遷移時にWorkflowでパラメータを指定して渡す処理があります。
そもそもパラメータとは?
値を与えるという意味で、引数ともいいます。
普段URLを見た時にkey=?やid=?というのを見かけると思うのですが、別ページや詳細ページに遷移する時に、画面で操作した値(例えば検索にかけた値)をURLで値を引き継ぎができます。
そして遷移した際にデータを表示するという便利なものがWEBの仕組みとしてあります。
Bubbleでパラメータの渡し方
主にページ遷移時にパラメータを渡すという設定があります。
WorkflowのGo to page…や、
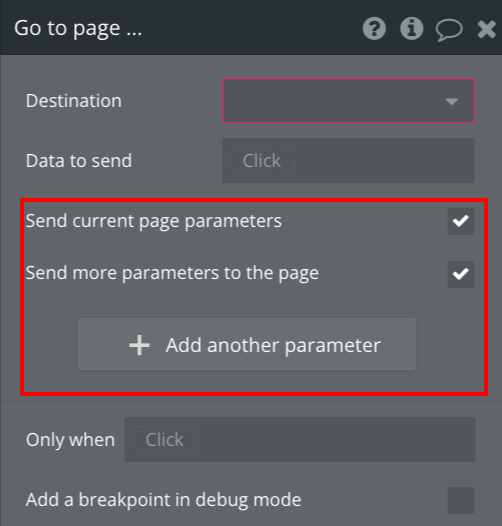
linkエレメントの下部にそれぞれSend parametersというのがあります。
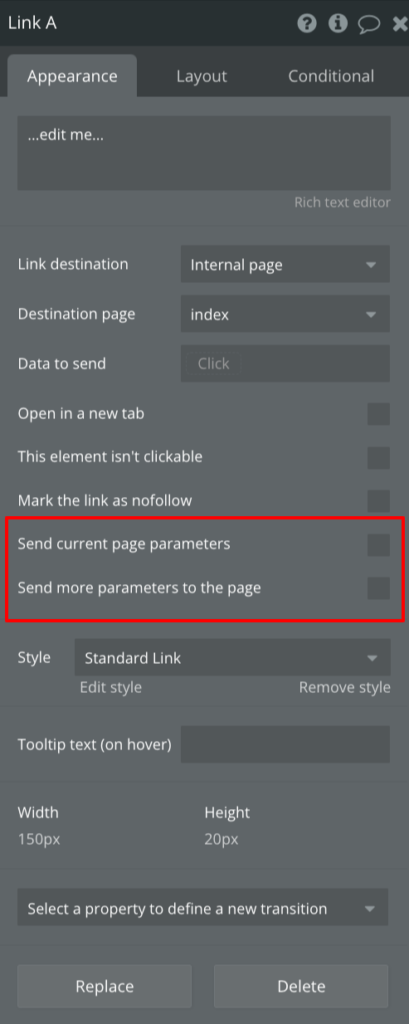
そちらが主にページ遷移時にパラメータを送る際の設定となります。
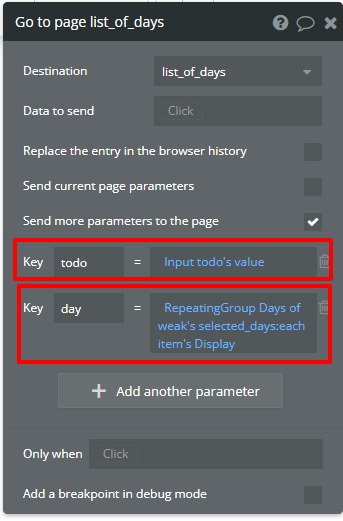
渡し方としては、Send more parameters to the pageを押して、それぞれ引き渡したい値をkeyに設定します。
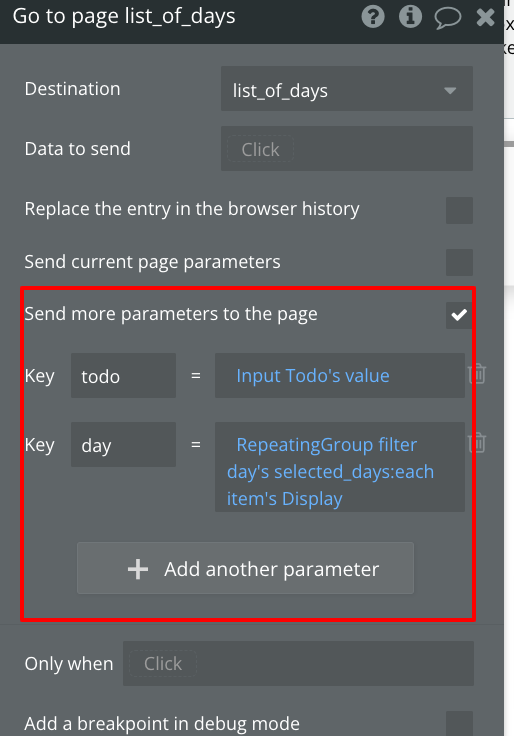
そしてページ遷移し、URLの箇所をみると赤色で囲まれている通りに、わざわざデータベースに保存せずに値を渡せます。
※%2C%20という文字があるのですが、こちらは文字を区切る際の「,」がURL上の文字列化しただけなので心配ございません。

パラメータから値を取得して、表示する
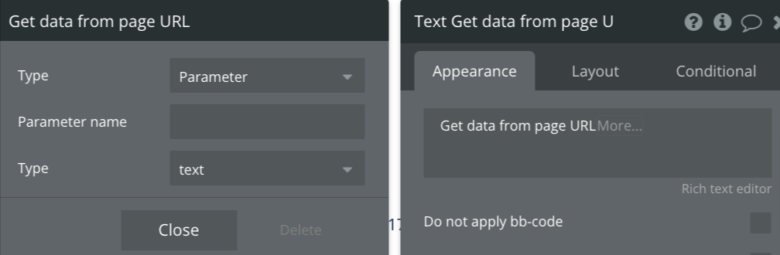
Bubbleでは、Get data from page URLというのからparameterの値を取得できます。
パラメータから値を取得する
先ほどURLで渡した値を取得するには、Get data from page URLを選択します。
パラメータ値を表示する
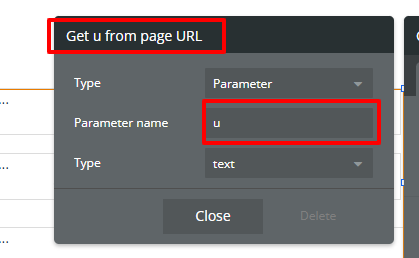
Parameter nameで、取得したいパラメータ名を入力します。
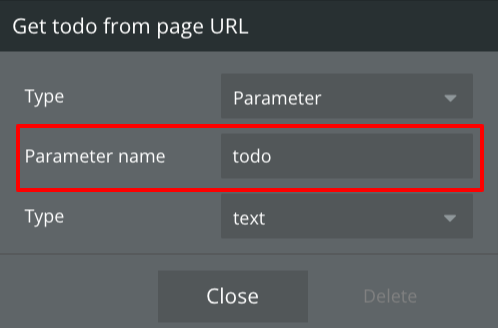
そうするとページ遷移時に、todoに入っていた値がページ遷移しても表示されます。

リストの値をパラメータで引き継ぐ
上記の方法を応用して、簡易的なアプリを制作してみようと思います。
動作確認
下記のような感じで、「曜日(リスト値)」と「todo」という値を引き継いだまま、ページ遷移しても情報を表示させて、ブラウザバックしても引き継がせるようにします。
実装する
Dataを用意する。
Data typesはDayを作成し、unique id、Day、todoを追加しました。
unique idはnumber型で、使い方としてはデータをそれぞれ連番でつけておき、詳細画面で連番からデータを簡易的に表示するためです。
toodはtext型で、DayはField typeをOption setで作成したものを指定しました。

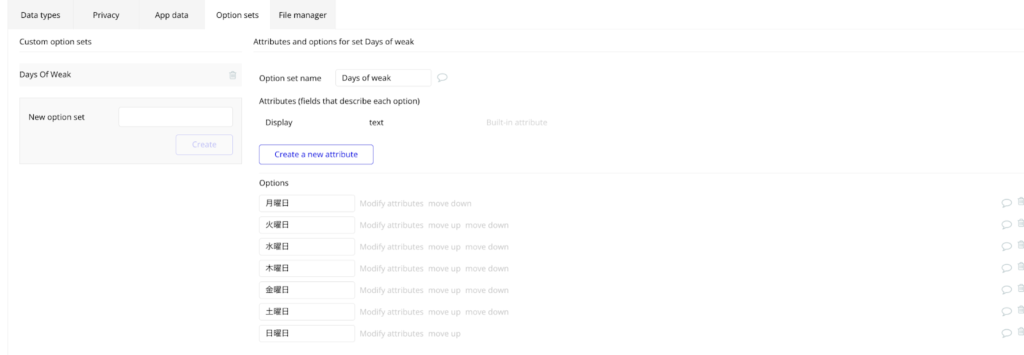
Option setsの設定は、Days of weekという名前でそれぞれ曜日を追加しました。
メインページのDesign
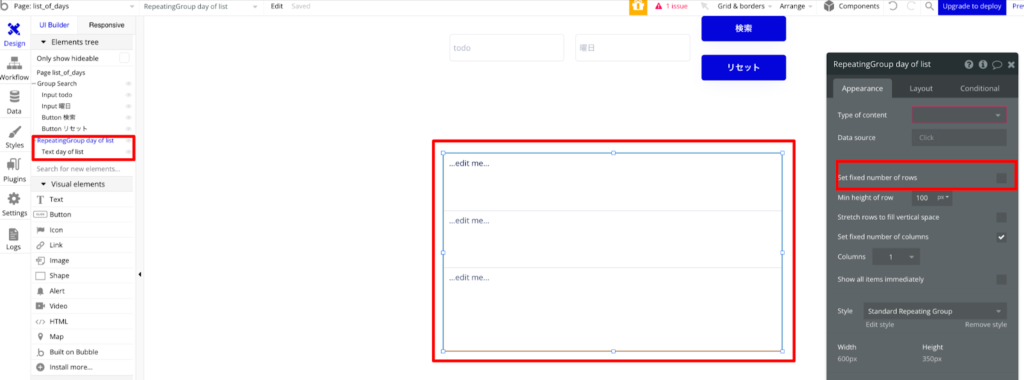
ページを作成して、Groupエレメントを配置後、inputエレメント、Buttonエレメントを2つ配置します。

Repeating groupを配置して、列内にTextエレメント、Layoutの設定で縦上限を外すためにrowsを外します。
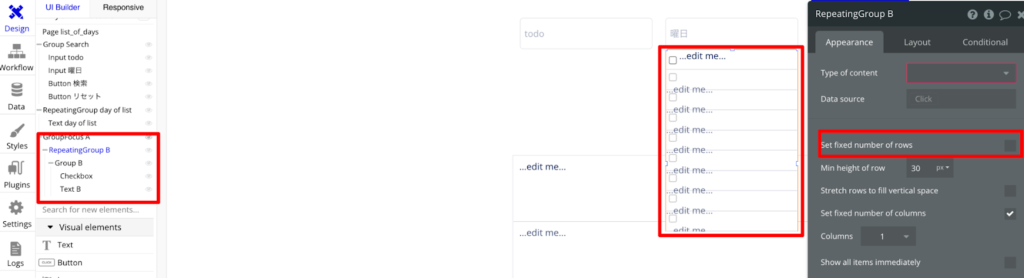
Input 曜日にフォーカスした際に表示させたいので、Group fucusを配置して、Input 曜日を選びます。

Repeating groupを配置して、それぞれ小さいですがエレメントを入れ込みます。コツとして、左のelement treeを操作しながら、各エレメントのサイズを直接調整することです。
サブページのDesign
後ほどページ遷移する際に必要なので、予め作成しておきます。
ページを作成して、Groupエレメントを配置して、Textエレメントを3つ入れます。

Unique idからデータを表示する
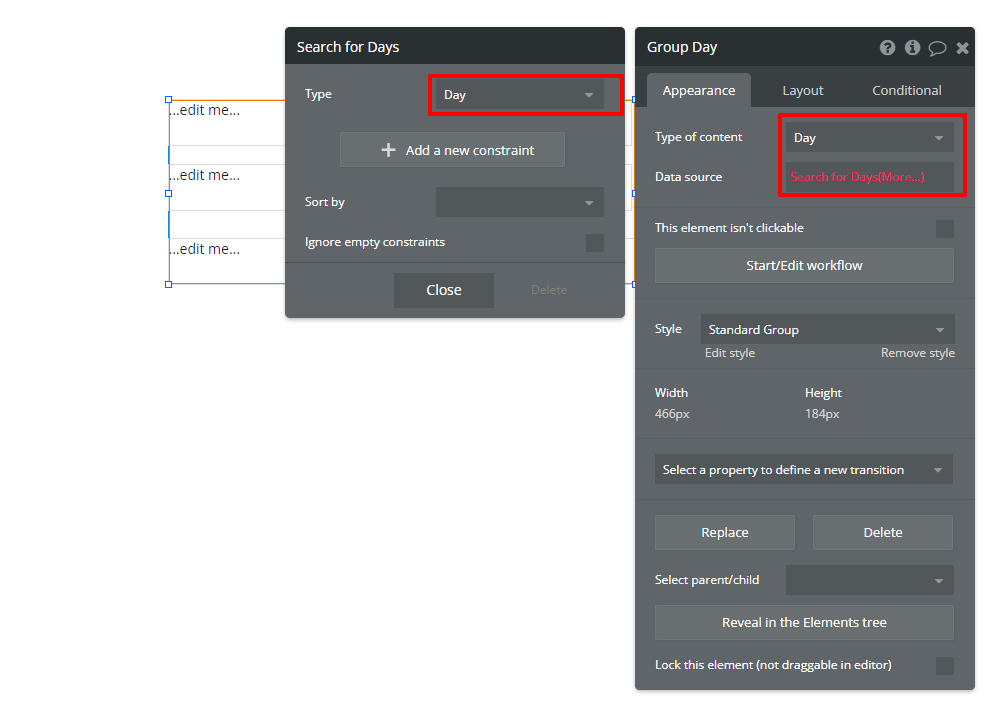
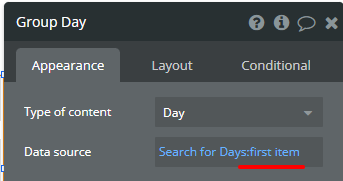
Groupエレメントを設定します。
①Type of contentはDay
②Data sourceはDo search forを選択し、TypeはDayを選択します。
Add a new Constraintでunique id を指定して
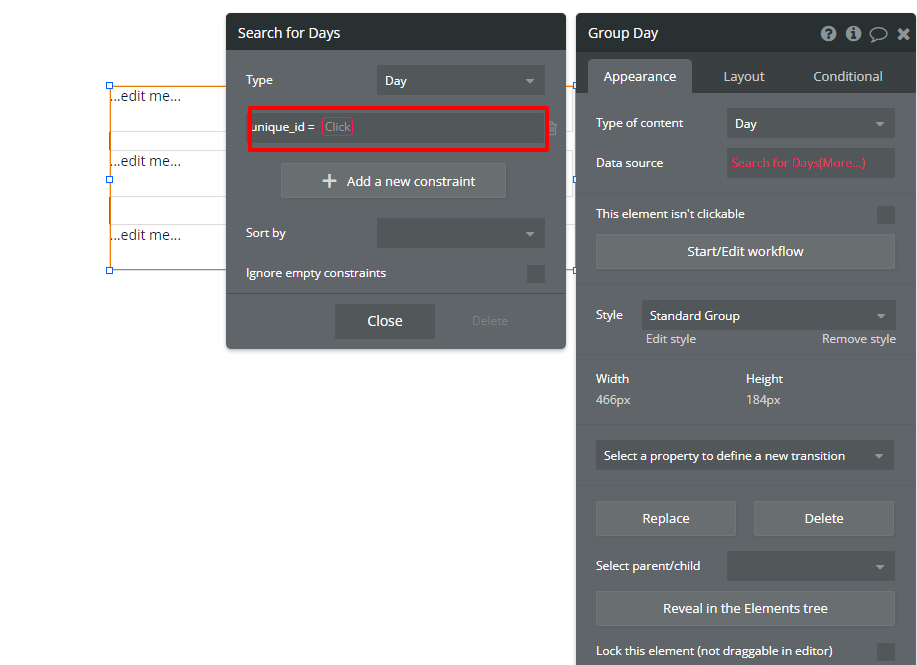
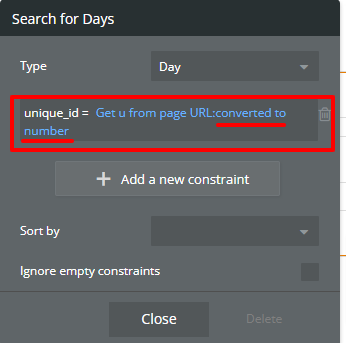
Get data from pageからunique_idを取得するために設定します。
この場合だと取得する際に文字列となっているので、number型に変換します。
unique idで検索して取得したリストは1つだけなので、first itemと指定します。
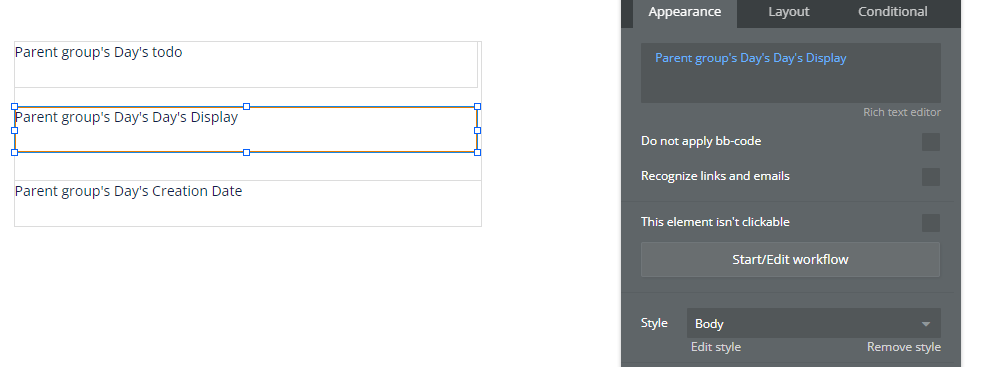
配置したTextエレメントに、値を表示します。
①Parent group’s Day’s todoにします。
②Parent group’s Day’s Day’s displayにします。
③Parent group’s Day’s Creation Date
リストの表示設定
検索処理を反映させるために、Repeating group設定を先にします。
Type of contentはDay、Data sourceはDo search forからTypeをDayにします。
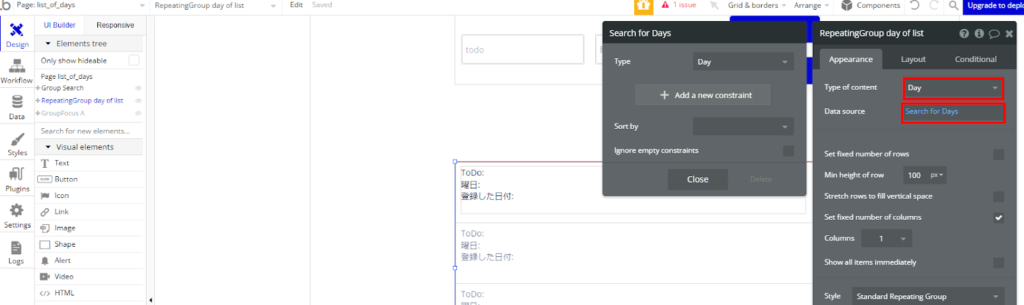
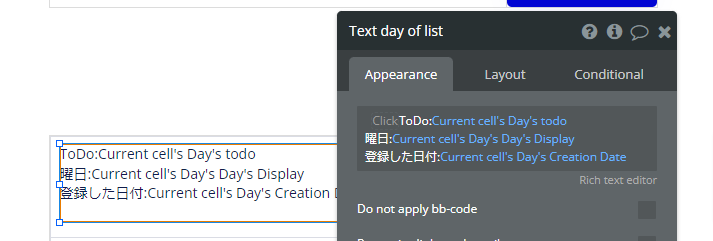
Textエレメントには、サブページと同じような形で設定します。
checkbox型のリスト作成
次に曜日選択を設定します。
Group focus内のRepeating Groupを開きます。
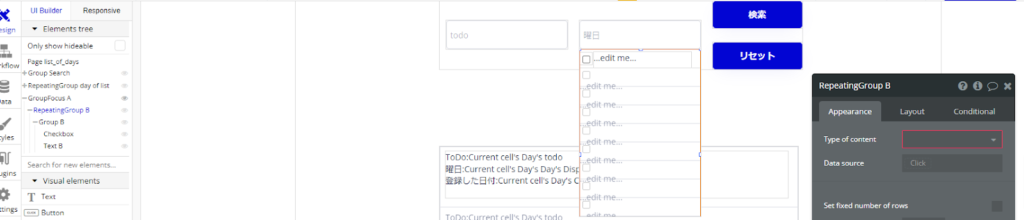
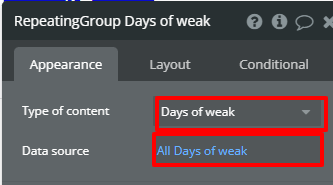
Type of contentはDays of weekで、Data sourceはAll Days of weak、option setsで設定したリストを選択します。
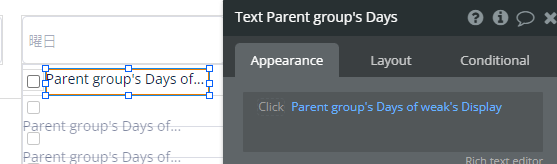
Repeating group内のGroupにもType of contentの設定をし、Data sourceはそれぞれ曜日を表示するようにします。

Text エレメントの設定もします。
Input曜日を指定したときに、Group Focusを出現させたいので、Group化して、Workflowを開きます。
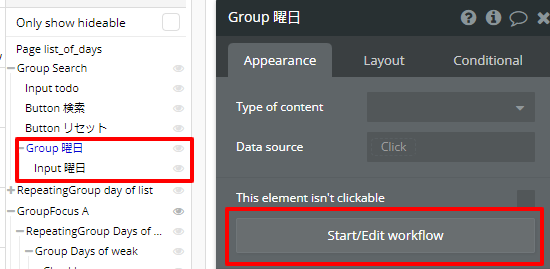
show elementで、Focusエレメントを指定します。
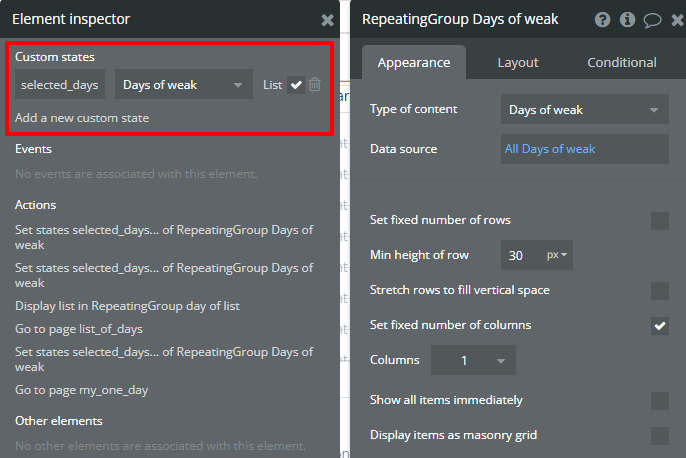
曜日をCheckboxで選択した分だけでリストを作成するための設定をしたいので、Repeating Groupのinspectorを開き、custom statesを設定します。
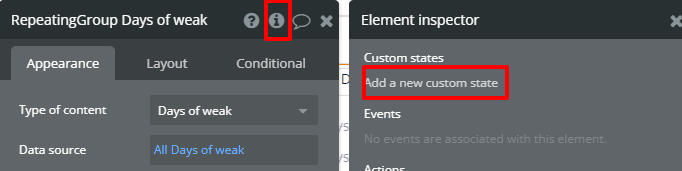
下記の内容で作成します。
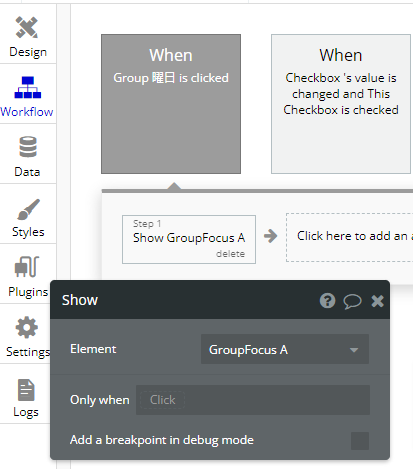
次にcheckboxがチェック状態になったら、リストに追加する処理を作りたいと思います。
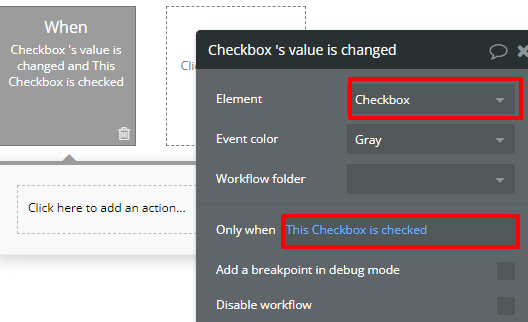
Workflowを開いて、値が変更された時の処理を指定します。
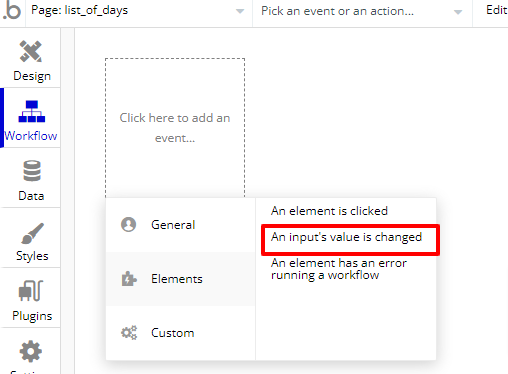
ElementはCheckboxを指定して、Only whenにはcheckがされた時の処理を入れます。
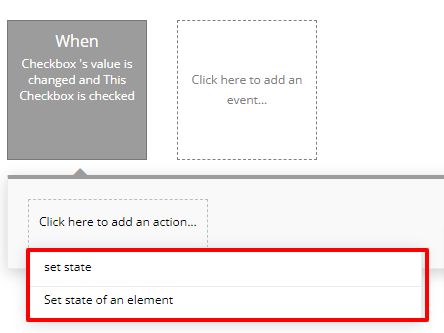
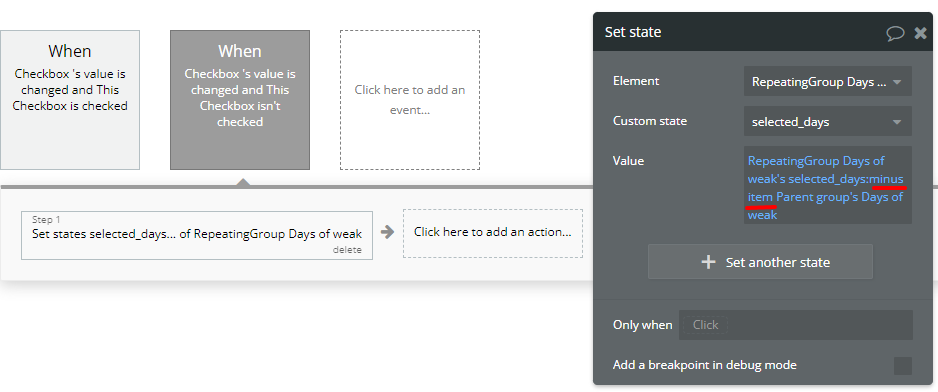
step1では、set stateを選択し、
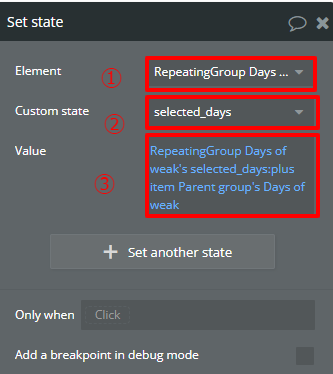
①Elementは曜日を表示しているRepeating groupを指定し、
②Custom stateはselected_daysを指定し、
③Valueには、selected_daysをplus itemでcheckboxにした曜日を入れるようにします。
次にcheckboxが外された時に、選択されていた曜日リストから減らしたいので、WFをコピーして、貼り付けます。
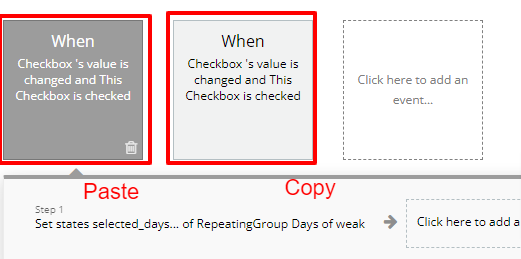
もう一つの処理には、Checkが外された時と指定して、
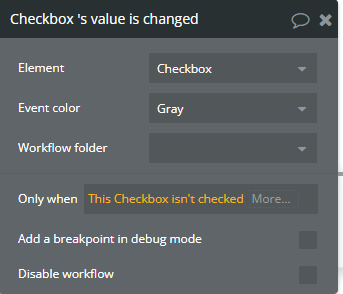
Step1のValueで、plus itemからminus itemにします。
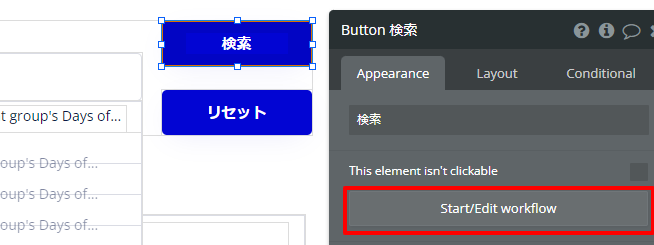
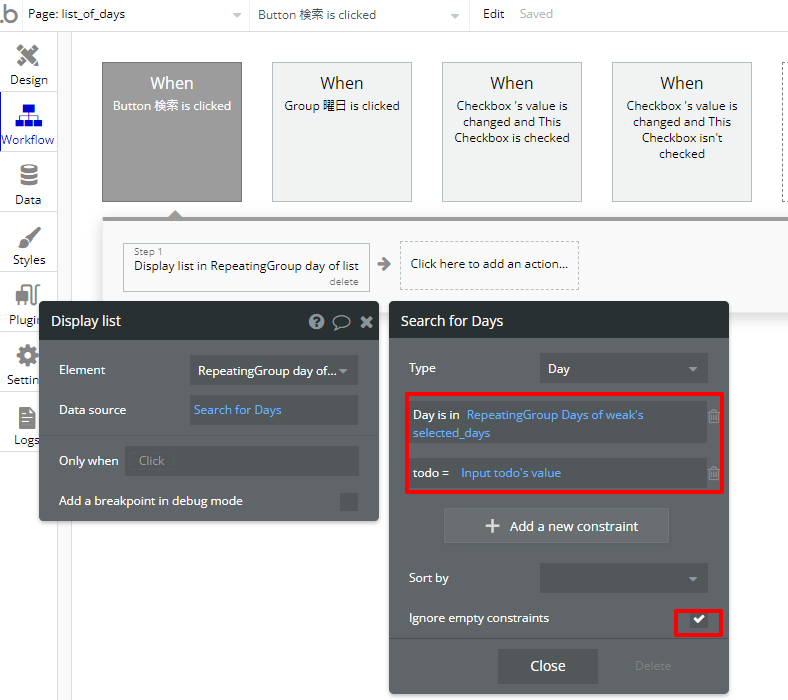
検索処理
検索ボタンを押した時に、処理を走らせます。
ElementはRepeating groupを指定して、Data sourceでは、do search forを選択します。尚、TypeはDayにします。
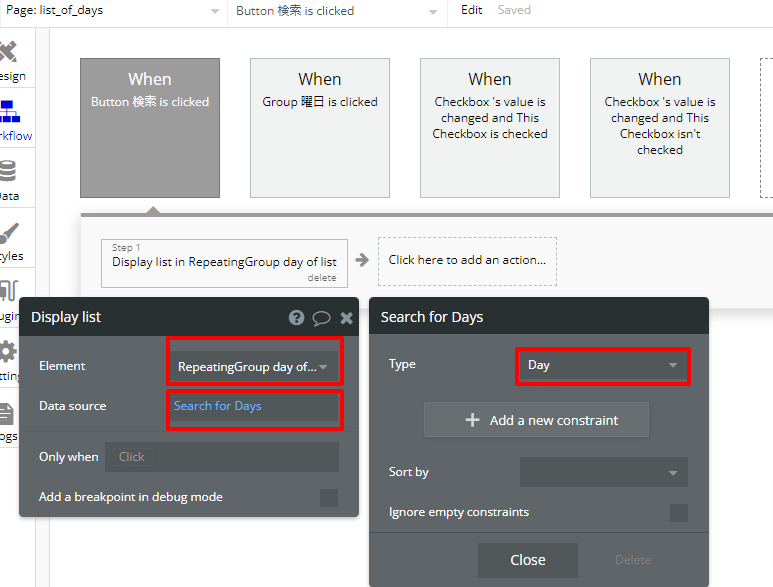
Input todoで入力した内容、選択した曜日を指定するに2つ設定して、Ignore empty constarainsを忘れずにCheckすることで、どちらかが空白でも検索が走るようになります。
parameterを渡す
次に検索した際に、parameterを持たせるようにします。
NavigationからGo to page…を選択して、今回は遷移しないのでメインページを選択します。
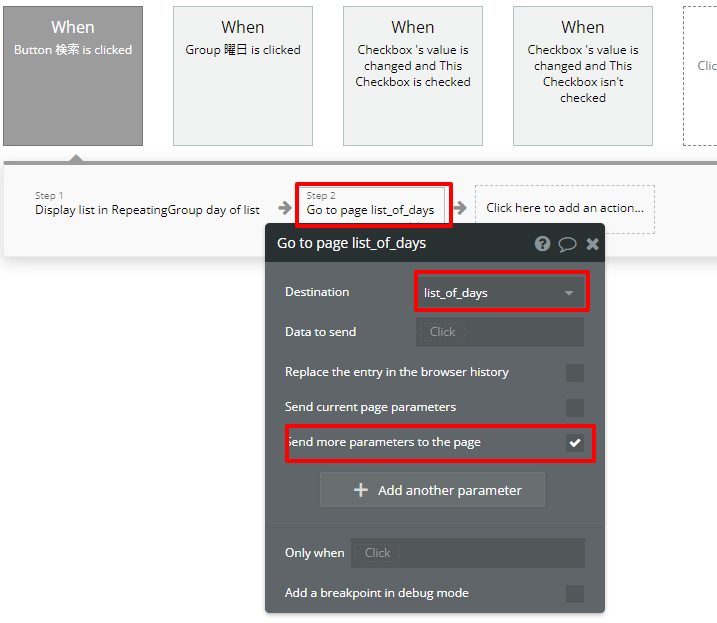
それぞれ2つ追加します。
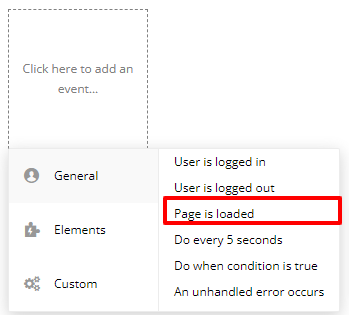
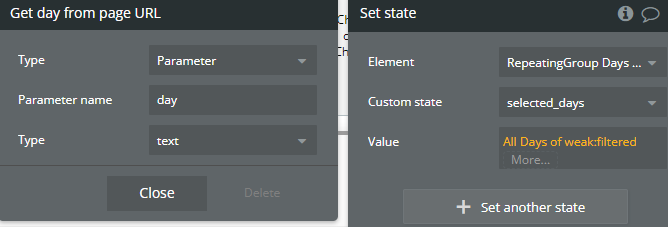
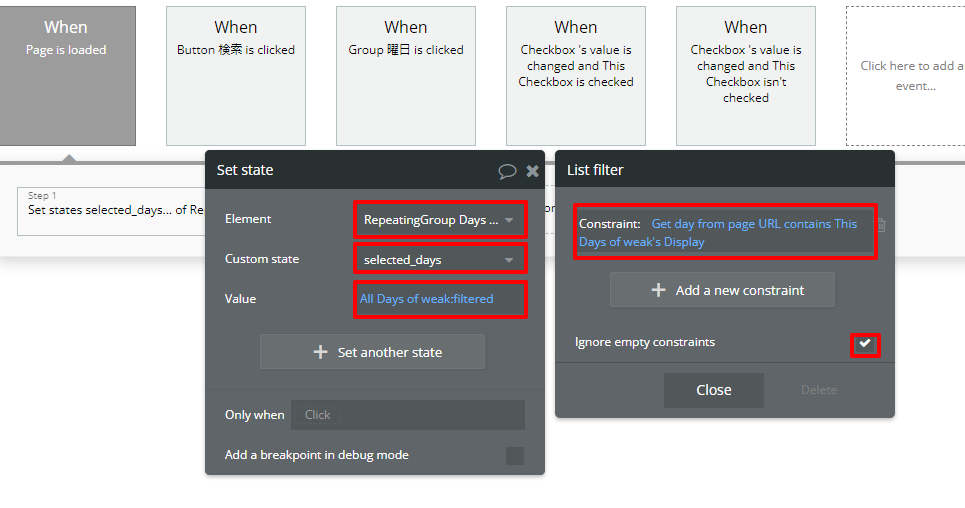
ページ読み込み時の処理
これで検索した際に、URLのパラメータに値を保持できるので、ページを更新しても値が消えないようにできました。
ですがエレメント上では初期値が設定されていないため、消えています。なのでページを読み込んだ時の処理を設定します。
ValueにはOption setsで作成した曜日リストに含まれている曜日をParameterで取得した値をテキストで取得し、曜日リストのテキストで絞り込むを行います。
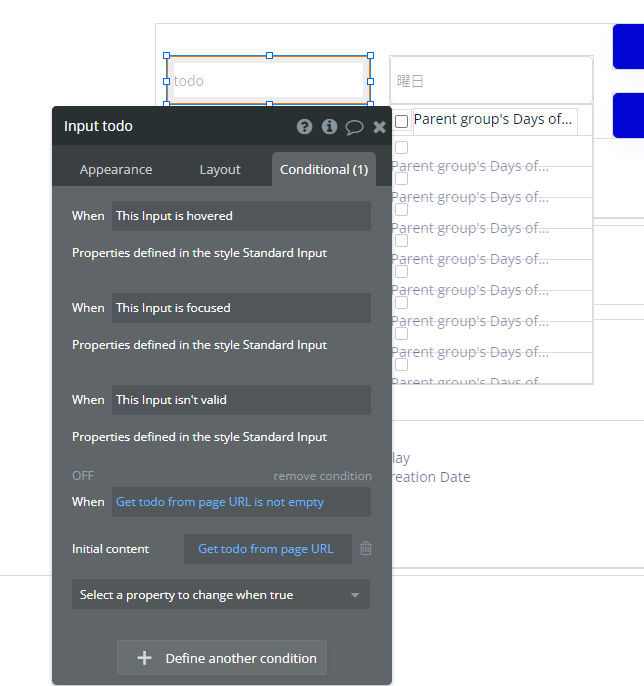
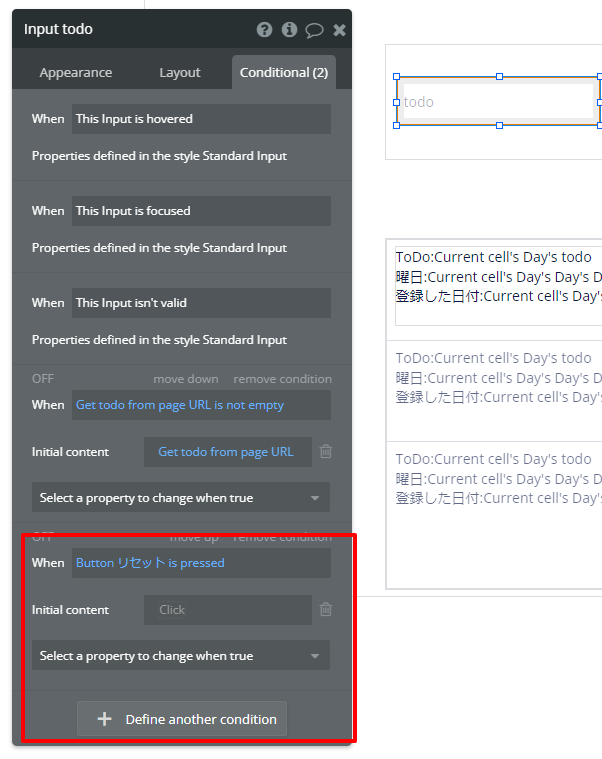
Input Todoには、初期値でURLにTodoに値が入っていたら、そちらを表示するように、Conditional設定します。
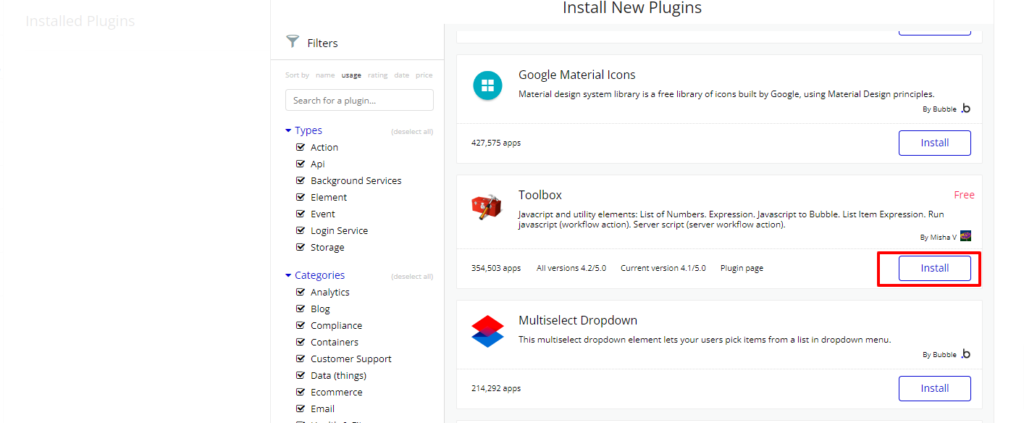
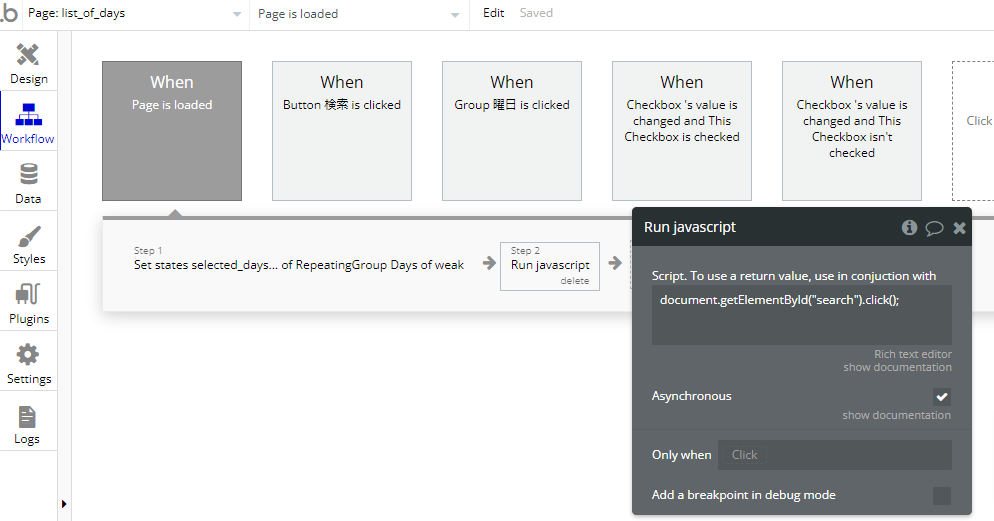
ページ読み込み時のStep2では、自動で検索できるようにしたいので、pluginsからtoolboxをインストールします。
検索ボタンにIDを付与したいので、SettingからIDを使えるように設定します。

Workflowに戻り、Run javascriptで下記のコードを貼り付けます。
document.getElementById(“search”).click();
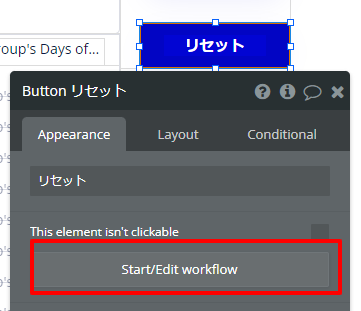
リセット処理
リセットボタンを押した時の処理設定します。
WFでは、Parameterの値を空に設定します。
Input todoのConditionalでは、下記のように指定します。
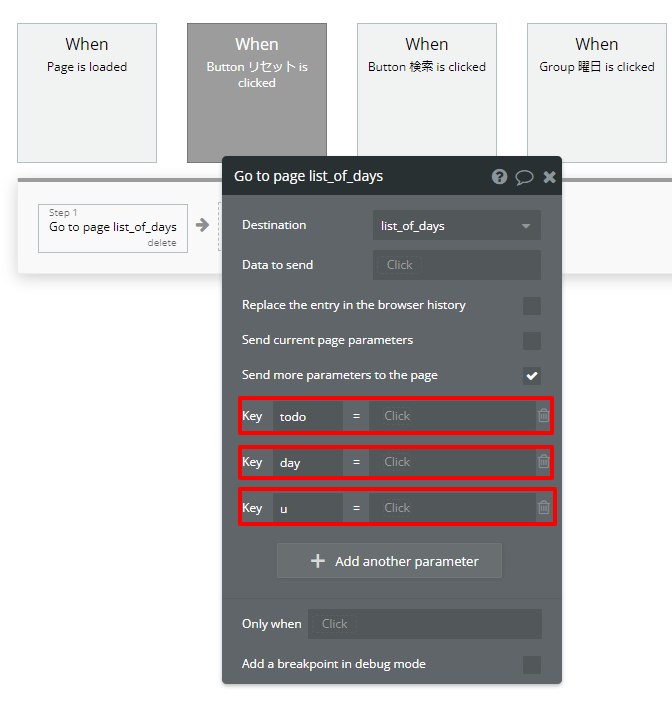
最後にTextエレメントを押した時に、サブページに遷移するようにします。
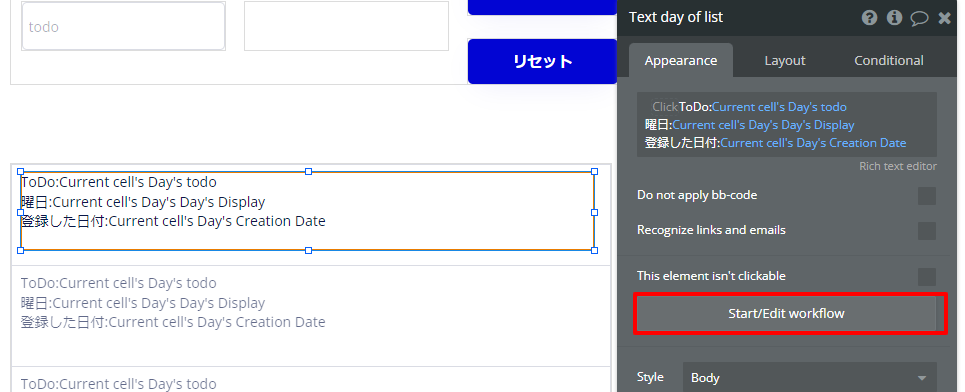
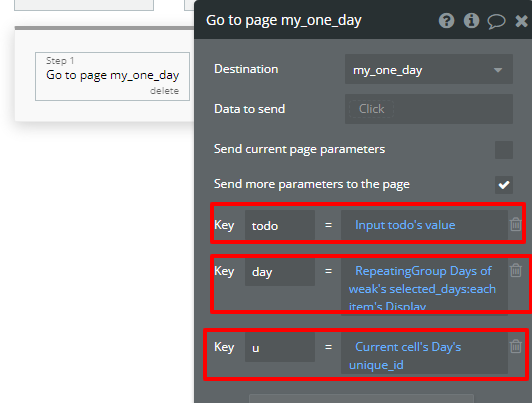
NavigationからGo to page…を選択して、ページ遷移時にparameterを送るようにします。
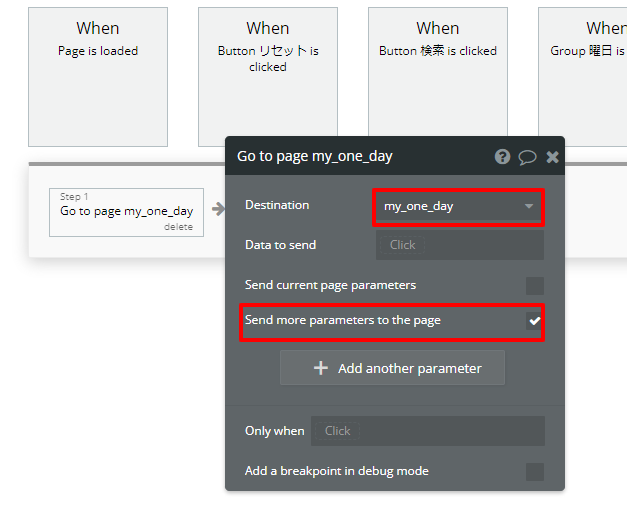
3つのパラメータ設定をしたら、終わりです。
まとめ
今回はBubbleでparameterの使い方を主に、リストでの渡し方について解説致しました。
プログラミングの世界ではサーバー言語でparameterを指定したりなど様々あると思うのですが、ノーコードですとただ値をkeyで指定するだけなので設定が簡単になりますね。
以上、今回は リストの検索結果をパラメータで引き継ぐ方法についてでした。
メンバーを募集中!
当社ではお客様に向き合い、お客様の事業成功にコミットをできる仲間を募集しています。
正社員、インターンから副業まで、幅広く採用活動を進めております。プロジェクトマネージャーやシステムエンジニアとして当社のシステム開発業務に携わってみませんか?
当社と共に、業界トップを目指して挑戦したい方は未経験者から経験者まで広く募集しているので、ぜひエントリーをお待ちしています。


